Setting Up an HTTP Proxy on Linux: A Comprehensive Guide
In today’s interconnected world, online privacy and security are paramount. An HTTP proxy server acts as an intermediary between your computer and the internet, providing an additional layer of security and anonymity. This guide provides a comprehensive walkthrough on how to set up an HTTP proxy on a Linux system. Whether you’re a seasoned system administrator or a curious beginner, understanding how to configure an HTTP proxy is a valuable skill. An HTTP proxy can mask your IP address, bypass geo-restrictions, and improve network performance through caching.
Understanding HTTP Proxies
Before diving into the configuration process, it’s crucial to understand what an HTTP proxy is and how it functions. An HTTP proxy server receives requests from clients (like your web browser), forwards them to the destination server, and then relays the response back to the client. This process hides the client’s IP address, making it appear as if the request originated from the HTTP proxy server itself.
Benefits of Using an HTTP Proxy
- Enhanced Privacy: Masks your IP address, making it harder to track your online activities.
- Bypassing Geo-Restrictions: Access content that may be blocked in your region.
- Improved Security: Adds a layer of protection against malicious websites and attacks.
- Content Filtering: Allows administrators to control and monitor internet usage.
- Caching: Stores frequently accessed content, reducing bandwidth usage and improving loading times.
Choosing the Right HTTP Proxy Software
Several HTTP proxy software options are available for Linux, each with its own strengths and weaknesses. Some popular choices include:
- Squid: A high-performance caching proxy server widely used in enterprise environments.
- Tinyproxy: A lightweight and easy-to-configure HTTP proxy, ideal for smaller networks.
- Privoxy: A privacy-enhancing proxy that filters web pages and removes unwanted content.
For this guide, we will focus on setting up Squid, as it’s a robust and feature-rich option suitable for various scenarios. However, the general principles can be applied to other HTTP proxy software as well.
Installing Squid on Linux
The installation process varies slightly depending on your Linux distribution. Here’s how to install Squid on some popular distributions:
Debian/Ubuntu
Open your terminal and run the following commands:
sudo apt update
sudo apt install squid
CentOS/RHEL
Use the following commands:
sudo yum update
sudo yum install squid
Fedora
Run the following commands:
sudo dnf update
sudo dnf install squid
After the installation is complete, Squid should be running as a service. You can check its status using the following command:
sudo systemctl status squidConfiguring Squid
The main configuration file for Squid is located at /etc/squid/squid.conf. Before making any changes, it’s a good practice to back up the original file:
sudo cp /etc/squid/squid.conf /etc/squid/squid.conf.backupNow, open the configuration file using your favorite text editor (e.g., nano, vim):
sudo nano /etc/squid/squid.confThe configuration file contains numerous options, but we’ll focus on the essential ones for setting up a basic HTTP proxy.
Setting the HTTP Port
By default, Squid listens on port 3128. You can change this by modifying the http_port directive:
http_port 3128Replace 3128 with your desired port number.
Defining Access Control Lists (ACLs)
ACLs are used to control which clients are allowed to access the HTTP proxy. A common approach is to allow access from your local network. To do this, define an ACL for your local network:
acl localnet src 192.168.1.0/24 # Replace with your local networkThis line defines an ACL named localnet that matches traffic from the 192.168.1.0/24 network. Replace 192.168.1.0/24 with your actual local network address.
Allowing Access Based on ACLs
To allow access to the HTTP proxy based on the defined ACL, add the following lines to the configuration file:
http_access allow localnet
http_access deny all
These lines allow access from the localnet ACL and deny access from all other sources. It is critical to define which networks are allowed to use the HTTP proxy to prevent unauthorized access.
Configuring Cache Settings
Squid can cache frequently accessed content to improve performance. To configure cache settings, use the cache_dir directive:
cache_dir ufs /var/spool/squid 100 16 256This line defines a cache directory at /var/spool/squid with a maximum size of 100 MB, 16 first-level directories, and 256 second-level directories. Adjust these values based on your needs.
Restarting Squid
After making changes to the configuration file, you need to restart Squid for the changes to take effect:
sudo systemctl restart squidVerify that Squid is running without errors:
sudo systemctl status squidConfiguring Clients to Use the HTTP Proxy
Once Squid is configured, you need to configure your clients (e.g., web browsers, applications) to use the HTTP proxy. The configuration process varies depending on the client.
Configuring Web Browsers
Most web browsers allow you to configure HTTP proxy settings in their settings or preferences menu. For example, in Firefox, you can go to:
Settings -> General -> Network Settings -> Configure Proxy Access to the Internet
Then, select “Manual proxy configuration” and enter the IP address of your Linux server and the port number you configured in Squid (e.g., 3128).
Configuring Command-Line Tools
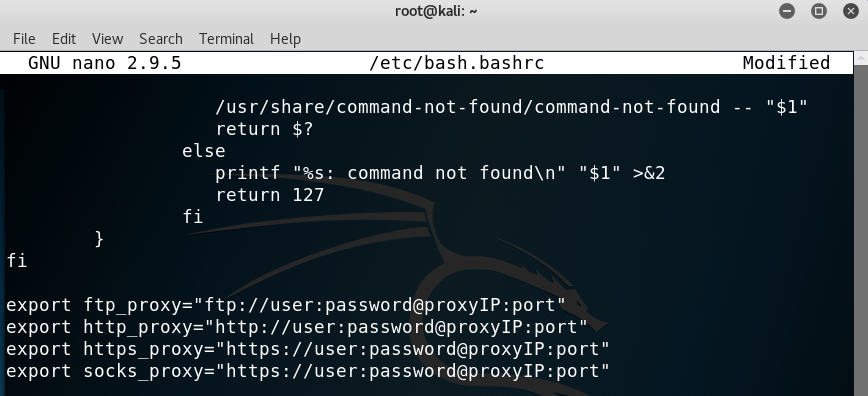
For command-line tools like curl or wget, you can set the http_proxy and https_proxy environment variables:
export http_proxy=http://your_server_ip:3128
export https_proxy=http://your_server_ip:3128
Replace your_server_ip with the IP address of your Linux server.
Testing the HTTP Proxy
To verify that the HTTP proxy is working correctly, you can use a website that displays your IP address, such as WhatIsMyIP.com. If the website shows the IP address of your Linux server instead of your actual IP address, then the HTTP proxy is working as expected.
Advanced Configuration Options
Squid offers many advanced configuration options for fine-tuning its behavior. Some useful options include:
- Authentication: Configure Squid to require users to authenticate before accessing the HTTP proxy.
- SSL Bumping: Intercept and inspect SSL/TLS traffic for security purposes.
- Content Filtering: Block access to specific websites or categories of content.
- Logging: Configure detailed logging of all HTTP proxy activity.
Troubleshooting Common Issues
If you encounter issues while setting up or using the HTTP proxy, consider the following troubleshooting steps:
- Check the Squid logs: The Squid logs (usually located at
/var/log/squid/access.logand/var/log/squid/cache.log) can provide valuable information about errors and warnings. - Verify network connectivity: Ensure that your clients can reach the Linux server and that the server can reach the internet.
- Check firewall settings: Make sure that your firewall allows traffic on the configured HTTP proxy port (e.g., 3128).
- Double-check configuration: Review your
squid.conffile for any typos or errors.
Setting up an HTTP proxy on Linux can significantly enhance your online privacy, security, and network performance. While this guide provides a comprehensive overview, remember to consult the Squid documentation for more detailed information and advanced configuration options. By understanding and implementing these steps, you can effectively manage and secure your internet traffic. You should now understand how to configure an HTTP proxy. [See also: Securing Your Linux Server] [See also: Understanding Network Protocols]
