How to Turn Off Proxy Settings in Chrome: A Comprehensive Guide
In today’s interconnected world, maintaining a secure and efficient browsing experience is paramount. Proxy servers, while offering benefits like enhanced privacy and access to geo-restricted content, can sometimes hinder performance or cause unexpected connectivity issues. Understanding how to turn off proxy settings in Chrome is a crucial skill for any internet user. This guide provides a comprehensive, step-by-step approach to disabling proxy settings in Google Chrome, ensuring a smooth and unrestricted browsing experience. Whether you’re troubleshooting connection problems, optimizing your browsing speed, or simply prefer a direct connection, this article will walk you through the process.
Understanding Proxy Settings
Before diving into the steps of disabling proxy settings, it’s essential to understand what proxy servers are and why they are used. A proxy server acts as an intermediary between your computer and the internet. When you use a proxy, your internet traffic is routed through the proxy server before reaching its destination. This can provide several advantages, including:
- Enhanced Privacy: By masking your IP address, a proxy server can make it more difficult for websites and online services to track your location and browsing activity.
- Access to Geo-Restricted Content: Proxy servers can be used to bypass geographical restrictions, allowing you to access content that is not available in your region.
- Improved Security: Some proxy servers offer additional security features, such as malware filtering and data encryption.
- Content Filtering: Organizations and schools often use proxy servers to filter content and restrict access to certain websites.
However, using a proxy server can also have drawbacks. It can slow down your internet speed, introduce compatibility issues, and, in some cases, even compromise your security if you’re using an untrustworthy proxy service. Therefore, knowing how to turn off proxy settings in Chrome is important.
Why You Might Need to Disable Proxy Settings
There are several reasons why you might want to disable proxy settings in Chrome:
- Troubleshooting Connection Issues: If you’re experiencing problems connecting to the internet or specific websites, disabling your proxy settings can help determine if the proxy server is the cause.
- Improving Browsing Speed: Proxy servers can sometimes slow down your internet speed, especially if the server is located far away or is experiencing high traffic. Disabling the proxy can lead to a faster browsing experience.
- Avoiding Compatibility Issues: Some websites or online services may not be compatible with certain proxy servers. Disabling the proxy can resolve these compatibility issues.
- Security Concerns: If you’re using a free or untrusted proxy service, it could potentially compromise your security by logging your browsing activity or injecting malware. Disabling the proxy can help protect your privacy and security.
- No Longer Needed: You may have initially set up a proxy for a specific purpose, such as accessing geo-restricted content, and no longer need it.
Step-by-Step Guide: How to Turn Off Proxy Settings in Chrome
The process of disabling proxy settings in Chrome varies slightly depending on your operating system. Below are instructions for Windows and macOS.
Disabling Proxy Settings on Windows
- Open Chrome Settings: Click on the three vertical dots (the Chrome menu) in the top-right corner of the Chrome window. Then, select “Settings” from the dropdown menu.
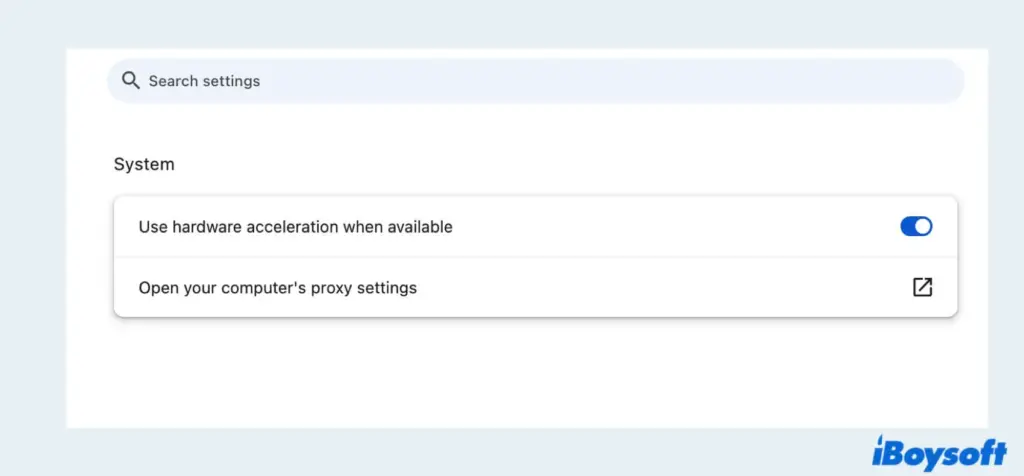
- Navigate to System Settings: In the Settings menu, scroll down to the bottom and click on “Advanced” to reveal more options. Then, under the “System” section, click on “Open your computer’s proxy settings.” This will open the Windows proxy settings.
- Disable Proxy Server: In the “Automatic proxy setup” section, ensure that “Automatically detect settings” is turned on. In the “Manual proxy setup” section, make sure the “Use a proxy server” option is turned off. If it’s on, toggle the switch to the off position.
- Apply Changes: After disabling the proxy server, click “Save” at the bottom of the window to apply the changes.
- Restart Chrome: Close and reopen Chrome to ensure that the changes take effect.
Disabling Proxy Settings on macOS
- Open Chrome Settings: Click on the three vertical dots (the Chrome menu) in the top-right corner of the Chrome window. Then, select “Settings” from the dropdown menu.
- Navigate to System Settings: In the Settings menu, scroll down to the bottom and click on “Advanced” to reveal more options. Then, under the “System” section, click on “Open your computer’s proxy settings.” This will open the Network settings in System Preferences.
- Select Your Network Connection: In the Network settings, select the network connection you are using (e.g., Wi-Fi or Ethernet) from the list on the left.
- Click on “Advanced”: Click on the “Advanced” button in the bottom-right corner of the Network settings window.
- Go to the “Proxies” Tab: In the Advanced settings window, click on the “Proxies” tab.
- Uncheck All Proxy Protocols: In the “Proxies” tab, uncheck all the proxy protocols listed (e.g., Web Proxy (HTTP), Secure Web Proxy (HTTPS), SOCKS Proxy).
- Apply Changes: Click “OK” to close the Advanced settings window, and then click “Apply” in the Network settings window to save the changes.
- Restart Chrome: Close and reopen Chrome to ensure that the changes take effect.
Alternative Methods to Disable Proxy Settings
In addition to the methods described above, there are alternative ways to turn off proxy settings in Chrome. These methods may be useful in specific situations or for users who prefer a different approach.
Using Chrome Flags
Chrome Flags are experimental features that can be enabled or disabled in Chrome. One of these flags can be used to disable proxy settings.
- Open Chrome Flags: Type
chrome://flagsin the Chrome address bar and press Enter. - Search for Proxy Settings: In the search box at the top of the Flags page, type “proxy”.
- Disable Experimental QUIC protocol: Look for the flag labeled “Experimental QUIC protocol”. If it’s enabled, disable it by selecting “Disabled” from the dropdown menu.
- Relaunch Chrome: Click the “Relaunch” button at the bottom of the page to restart Chrome and apply the changes.
Using Command-Line Switches
Command-line switches can be used to launch Chrome with specific settings. This method is more advanced but can be useful for automating the process of disabling proxy settings.
- Close Chrome: Ensure that Chrome is completely closed before proceeding.
- Open Command Prompt (Windows) or Terminal (macOS): Open the Command Prompt (Windows) or Terminal (macOS).
- Launch Chrome with the
--no-proxy-serverswitch: Type the following command and press Enter:- Windows:
chrome.exe --no-proxy-server - macOS:
/Applications/Google Chrome.app/Contents/MacOS/Google Chrome --no-proxy-server
- Windows:
This will launch Chrome with proxy settings disabled.
Verifying That Proxy Settings Are Disabled
After following the steps above, it’s important to verify that the proxy settings have been successfully disabled. Here are a few ways to do this:
- Check Chrome Settings: Go back to the Chrome settings and verify that the proxy settings are disabled as described in the step-by-step guide.
- Use an Online IP Address Checker: Visit a website that displays your IP address (e.g., whatismyip.com). If the IP address displayed matches your actual IP address, then the proxy server is not being used.
- Test Your Internet Speed: Run an internet speed test (e.g., speedtest.net) and compare the results to your previous speed. If your speed has improved, it’s likely that the proxy server was slowing down your connection.
Troubleshooting Common Issues
If you encounter problems while disabling proxy settings in Chrome, here are a few troubleshooting tips:
- Ensure That You Have Administrator Privileges: In some cases, you may need administrator privileges to modify proxy settings. Make sure you are logged in to an administrator account.
- Check for Conflicting Software: Some software, such as VPN clients or security software, may interfere with proxy settings. Try disabling these programs temporarily to see if it resolves the issue.
- Reset Chrome Settings: If all else fails, you can try resetting Chrome settings to their default values. This will remove any custom settings, including proxy settings. To do this, go to Chrome settings, click on “Advanced,” and then click on “Restore settings to their original defaults.”
- Scan for Malware: Malware can sometimes modify proxy settings without your knowledge. Run a full system scan with a reputable antivirus program to check for malware.
Conclusion
Knowing how to turn off proxy settings in Chrome is a valuable skill for anyone who uses the internet regularly. By following the steps outlined in this guide, you can easily disable proxy settings and ensure a smooth, secure, and efficient browsing experience. Whether you’re troubleshooting connection issues, improving your browsing speed, or simply prefer a direct connection, this article has provided you with the knowledge and tools you need to take control of your proxy settings. Remember to verify that the changes have been applied and troubleshoot any issues that may arise. With a little effort, you can enjoy a faster, more reliable, and more secure browsing experience.
Understanding and managing your browser’s proxy settings is part of maintaining a healthy and secure online presence. By taking the time to learn about these settings and how to modify them, you can ensure that your browsing experience is always optimized for your needs. So, the next time you encounter a proxy-related issue, you’ll be well-equipped to resolve it quickly and efficiently. [See also: How to Clear Cache and Cookies in Chrome] [See also: Troubleshooting Common Chrome Errors] [See also: Best Chrome Extensions for Privacy].
