How to Modify IP Address: A Comprehensive Guide
Understanding and managing your IP address is crucial in today’s digital landscape. Whether you’re troubleshooting network issues, enhancing your online privacy, or configuring your home network, knowing how to modify IP address settings is a valuable skill. This guide provides a comprehensive overview of different methods to change your IP address on various devices and operating systems, ensuring you can navigate the process with confidence.
Why Modify Your IP Address?
Before diving into the ‘how,’ let’s understand the ‘why.’ There are several reasons why you might want to modify IP address settings:
- Troubleshooting Network Issues: Sometimes, your IP address can conflict with other devices on the network, leading to connectivity problems. Changing your IP address can resolve these conflicts.
- Enhanced Privacy: While not a foolproof solution, changing your IP address can make it slightly harder for websites and services to track your online activity.
- Accessing Region-Restricted Content: Some websites and services restrict access based on your geographical location, determined by your IP address. Modifying your IP address can allow you to bypass these restrictions.
- Security Concerns: In certain situations, changing your IP address can add an extra layer of security, especially if you suspect your IP address has been compromised.
- Setting up a Static IP: For devices like printers or servers, a static IP address ensures consistent connectivity.
Understanding IP Addresses: Dynamic vs. Static
IP addresses come in two main flavors: dynamic and static. Understanding the difference is essential when learning how to modify IP address settings.
- Dynamic IP Addresses: These are assigned automatically by your Internet Service Provider (ISP) using DHCP (Dynamic Host Configuration Protocol). They can change periodically. Most home users have dynamic IP addresses.
- Static IP Addresses: These are manually configured and remain constant unless changed manually. Static IP addresses are typically used for servers, printers, or other devices that require a consistent address.
Methods to Modify Your IP Address
There are several ways to modify IP address settings, depending on your needs and technical expertise.
Releasing and Renewing Your IP Address (Dynamic IPs)
For dynamic IP addresses, the easiest way to get a new IP address is to release your current one and then renew it. This forces your device to request a new IP from your ISP.
Windows
- Open Command Prompt as Administrator: Search for “cmd” in the Start menu, right-click on “Command Prompt,” and select “Run as administrator.”
- Release Your IP Address: Type `ipconfig /release` and press Enter. You should see a message indicating that your IP address has been released.
- Renew Your IP Address: Type `ipconfig /renew` and press Enter. Your computer will request a new IP address from your ISP.
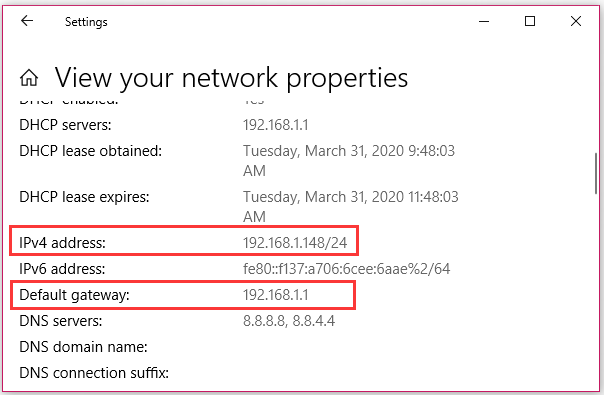
- Verify Your New IP Address: Type `ipconfig /all` and press Enter. Look for the “IPv4 Address” to see your new IP address.
macOS
- Open System Preferences: Click on the Apple menu and select “System Preferences.”
- Go to Network: Click on “Network.”
- Select Your Network Connection: Choose your Wi-Fi or Ethernet connection from the left sidebar.
- Click Advanced: Click on the “Advanced” button.
- Go to TCP/IP Tab: Select the “TCP/IP” tab.
- Renew DHCP Lease: Click on the “Renew DHCP Lease” button. This will release your current IP address and request a new one.
- Verify Your New IP Address: Your new IP address will be displayed in the TCP/IP tab.
Using a VPN (Virtual Private Network)
A VPN is a service that encrypts your internet traffic and routes it through a server in a different location. This effectively masks your real IP address and replaces it with the IP address of the VPN server. Using a VPN is a popular method to modify IP address settings for enhanced privacy and security.
- Choose a VPN Provider: Select a reputable VPN provider that meets your needs. Consider factors like server locations, speed, security features, and price. [See also: Best VPN Services for Privacy]
- Download and Install the VPN Software: Download the VPN client software for your operating system from the VPN provider’s website and install it.
- Connect to a VPN Server: Launch the VPN software, log in with your credentials, and select a server location. Click the “Connect” button.
- Verify Your New IP Address: Once connected, your IP address will be changed to the IP address of the VPN server. You can verify this by visiting a website that displays your IP address, such as whatismyipaddress.com.
Using a Proxy Server
A proxy server acts as an intermediary between your device and the internet. When you connect to a website through a proxy server, the website sees the IP address of the proxy server instead of your real IP address. This is another way to modify IP address, though it typically offers less security than a VPN.
- Find a Proxy Server: There are many free and paid proxy server lists available online. However, be cautious when using free proxies, as they may not be secure. [See also: Secure Proxy Server Options]
- Configure Your Browser or Operating System:
- Browser: Most browsers allow you to configure proxy settings in their settings menu.
- Operating System: You can also configure proxy settings at the operating system level, which will affect all applications that use your internet connection.
- Enter the Proxy Server Details: Enter the IP address and port number of the proxy server in the appropriate settings.
- Verify Your New IP Address: Visit a website that displays your IP address to verify that your IP address has been changed.
Manually Assigning a Static IP Address
If you need a consistent IP address for a specific device, you can manually assign a static IP address. This is a more advanced method of how to modify IP address, and it requires some understanding of your network configuration.
Windows
- Open Network Connections: Right-click on the network icon in the system tray and select “Open Network & Internet settings.” Click on “Change adapter options.”
- Select Your Network Adapter: Right-click on your network adapter (e.g., Ethernet or Wi-Fi) and select “Properties.”
- Select Internet Protocol Version 4 (TCP/IPv4): In the list of items, select “Internet Protocol Version 4 (TCP/IPv4)” and click on “Properties.”
- Assign a Static IP Address: Select “Use the following IP address” and enter the following information:
- IP address: Choose an IP address within your network’s range that is not already in use.
- Subnet mask: This is usually 255.255.255.0 for most home networks.
- Default gateway: This is usually your router’s IP address.
- Preferred DNS server: You can use your ISP’s DNS server or a public DNS server like Google’s (8.8.8.8) or Cloudflare’s (1.1.1.1).
- Click OK: Click “OK” to save your changes.
macOS
- Open System Preferences: Click on the Apple menu and select “System Preferences.”
- Go to Network: Click on “Network.”
- Select Your Network Connection: Choose your Wi-Fi or Ethernet connection from the left sidebar.
- Click Advanced: Click on the “Advanced” button.
- Go to TCP/IP Tab: Select the “TCP/IP” tab.
- Configure IPv4: From the “Configure IPv4” dropdown menu, select “Manually.”
- Assign a Static IP Address: Enter the following information:
- IP Address: Choose an IP address within your network’s range that is not already in use.
- Subnet Mask: This is usually 255.255.255.0 for most home networks.
- Router: This is usually your router’s IP address.
- Go to DNS Tab: Select the “DNS” tab and add your preferred DNS servers. You can use your ISP’s DNS server or a public DNS server like Google’s (8.8.8.8) or Cloudflare’s (1.1.1.1).
- Click OK: Click “OK” to save your changes.
Potential Risks and Considerations
While how to modify IP address settings can be beneficial, it’s essential to be aware of potential risks and considerations:
- Network Conflicts: When assigning a static IP address, ensure that the IP address you choose is not already in use by another device on the network. This can cause network conflicts and connectivity problems.
- Security Risks with Free Proxies: Free proxy servers can be unreliable and may expose your data to security risks. Use caution when using free proxies and consider using a reputable VPN service instead.
- VPN Performance: VPNs can sometimes slow down your internet speed due to the encryption and routing process. Choose a VPN provider with fast servers and optimized performance.
- ISP Monitoring: While VPNs can hide your IP address from websites, your ISP can still see that you are using a VPN. However, they cannot see the content of your encrypted traffic.
Conclusion
Knowing how to modify IP address settings is a valuable skill for troubleshooting network issues, enhancing privacy, and accessing region-restricted content. Whether you choose to release and renew your IP address, use a VPN or proxy server, or manually assign a static IP address, understanding the different methods and potential risks will empower you to manage your IP address effectively. By following the steps outlined in this guide, you can confidently navigate the process and take control of your online experience.
