How to Remove RTV Silicone: A Comprehensive Guide
Room Temperature Vulcanizing (RTV) silicone is a versatile sealant and adhesive used in a wide array of applications, from home improvement projects to automotive repairs. Its durability and flexibility make it a popular choice, but its tenacious nature can also make removal a challenge. Whether you’re dealing with old caulk, spilled sealant, or misplaced adhesive, knowing how to remove RTV silicone effectively is a valuable skill. This comprehensive guide will walk you through various methods and techniques to safely and efficiently remove RTV silicone from different surfaces.
Understanding RTV Silicone
Before diving into the removal process, it’s essential to understand what RTV silicone is and why it’s so difficult to remove. RTV silicone is a type of silicone rubber that cures at room temperature. It forms a strong, flexible bond that is resistant to water, chemicals, and extreme temperatures. This makes it ideal for sealing gaps, bonding materials, and protecting surfaces. However, these same properties also make it resistant to many common solvents and removal methods.
The challenge in removing RTV silicone lies in its chemical structure. Silicone polymers are highly cross-linked, creating a strong, resilient network. This network makes it difficult for solvents to penetrate and break down the silicone. Furthermore, RTV silicone often adheres strongly to surfaces, making it difficult to peel or scrape off without causing damage.
Tools and Materials Needed
Having the right tools and materials on hand can significantly simplify the process of removing RTV silicone. Here’s a list of essential items:
- Safety Glasses and Gloves: Protect your eyes and skin from chemicals and debris.
- Sharp Utility Knife or Razor Blade Scraper: For cutting and scraping away the silicone.
- Plastic Scraper: To avoid scratching delicate surfaces.
- Solvent or Silicone Remover: Chemical solutions designed to dissolve silicone.
- Heat Gun or Hair Dryer: To soften the silicone.
- Clean Cloths or Paper Towels: For wiping away residue.
- Mineral Spirits or Isopropyl Alcohol: For cleaning the surface after removal.
- Putty Knife: For stubborn areas.
Methods for Removing RTV Silicone
Several methods can be used to remove RTV silicone, depending on the surface and the age of the silicone. Here are some of the most effective techniques:
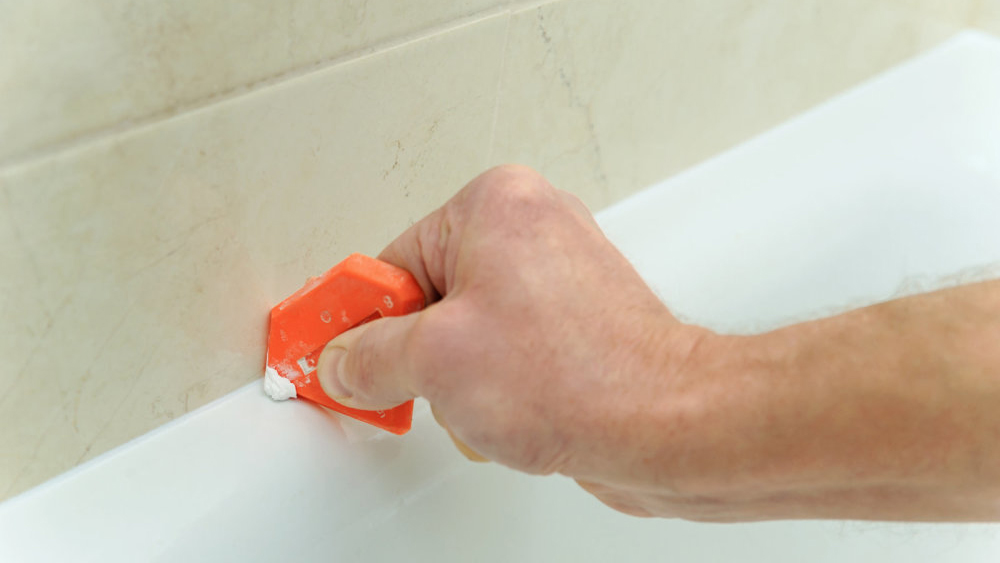
Mechanical Removal
Mechanical removal involves physically cutting and scraping away the silicone. This method is best for removing thick layers of silicone or when chemical solvents are not an option.
- Cutting the Silicone: Use a sharp utility knife or razor blade scraper to carefully cut along the edges of the silicone. Try to create a clean line to prevent tearing or damaging the surrounding surface.
- Scraping the Silicone: Once the edges are cut, use a plastic scraper or putty knife to gently scrape away the silicone. Apply steady pressure and work in small sections. If the silicone is particularly stubborn, try using a heat gun or hair dryer to soften it before scraping.
- Cleaning the Surface: After removing the bulk of the silicone, clean the surface with mineral spirits or isopropyl alcohol to remove any remaining residue.
Chemical Removal
Chemical removal involves using solvents or silicone removers to dissolve the silicone. This method is often more effective for removing thin layers of silicone or when mechanical removal is difficult.
- Applying the Solvent: Apply the solvent or silicone remover to the silicone. Follow the manufacturer’s instructions for application and dwell time. Some solvents may require multiple applications to fully dissolve the silicone.
- Allowing Dwell Time: Give the solvent enough time to penetrate and break down the silicone. This may take anywhere from a few minutes to several hours, depending on the product and the thickness of the silicone.
- Scraping the Dissolved Silicone: Once the silicone has softened, use a plastic scraper or putty knife to gently scrape away the dissolved silicone.
- Cleaning the Surface: After removing the dissolved silicone, clean the surface with mineral spirits or isopropyl alcohol to remove any remaining residue.
Heat Application
Applying heat can soften the silicone, making it easier to scrape away. This method is particularly useful for removing old or hardened silicone.
- Applying Heat: Use a heat gun or hair dryer to gently heat the silicone. Keep the heat source moving to avoid overheating or damaging the surface.
- Scraping the Softened Silicone: Once the silicone has softened, use a plastic scraper or putty knife to gently scrape away the silicone.
- Cleaning the Surface: After removing the silicone, clean the surface with mineral spirits or isopropyl alcohol to remove any remaining residue.
Removing RTV Silicone from Different Surfaces
The best method for removing RTV silicone can vary depending on the type of surface. Here are some tips for removing silicone from common surfaces:
Glass and Ceramics
Glass and ceramic surfaces are relatively resistant to scratching, so you can use a razor blade scraper to remove the silicone. However, it’s still important to be careful and avoid applying too much pressure. Chemical solvents and heat can also be used effectively on these surfaces.
Plastic
Plastic surfaces are more susceptible to scratching, so it’s best to use a plastic scraper and avoid using abrasive cleaners. Test any chemical solvents in an inconspicuous area first to ensure they don’t damage the plastic. Heat should be used sparingly to avoid melting or warping the plastic.
Metal
Metal surfaces are generally durable, but some metals can be scratched by abrasive tools. Use a plastic scraper or a putty knife with rounded edges to avoid scratching the metal. Chemical solvents and heat can be used effectively on metal surfaces.
Painted Surfaces
Painted surfaces are the most delicate and require extra care. Use a plastic scraper and avoid using harsh chemicals or excessive heat, as these can damage the paint. Test any solvents in an inconspicuous area first to ensure they don’t strip the paint.
Tips for Easier Removal
Here are some additional tips to make the process of removing RTV silicone easier:
- Work in Small Sections: Focus on removing small sections of silicone at a time. This will give you more control and prevent you from damaging the surface.
- Apply Even Pressure: When scraping the silicone, apply even pressure to avoid gouging or scratching the surface.
- Use the Right Tools: Using the right tools for the job can make a big difference. A sharp utility knife, a plastic scraper, and a good quality solvent can all help to speed up the process and prevent damage.
- Be Patient: Removing RTV silicone can be a time-consuming process. Be patient and persistent, and you’ll eventually get the job done.
- Ventilate the Area: When using chemical solvents, make sure to ventilate the area to avoid inhaling harmful fumes.
Safety Precautions
When removing RTV silicone, it’s important to take the following safety precautions:
- Wear Safety Glasses and Gloves: Protect your eyes and skin from chemicals and debris.
- Ventilate the Area: When using chemical solvents, make sure to ventilate the area to avoid inhaling harmful fumes.
- Read and Follow the Manufacturer’s Instructions: Always read and follow the manufacturer’s instructions for any chemical solvents or tools you are using.
- Dispose of Waste Properly: Dispose of used solvents and silicone scraps properly, according to local regulations.
- Keep Out of Reach of Children and Pets: Store solvents and tools out of reach of children and pets.
Alternative Products for Removing RTV Silicone
While dedicated silicone removers are the most effective, several alternative products can be used to remove RTV silicone. These alternatives may not be as potent but can be useful in a pinch or for minor residue removal:
- Vinegar: White vinegar can help soften silicone, making it easier to scrape off. Apply vinegar to the silicone, let it sit for 15-20 minutes, and then try scraping it away.
- WD-40: WD-40 can penetrate and loosen the bond of silicone, making it easier to remove. Spray WD-40 on the silicone, let it sit for a few minutes, and then try scraping it off.
- Goo Gone: Goo Gone is designed to remove sticky residues and can also be effective for removing silicone residue. Apply Goo Gone to the silicone, let it sit for a few minutes, and then try scraping it off.
Preventing Silicone Adhesion
Preventing silicone from adhering too strongly in the first place can make future removal much easier. Here are some tips to minimize adhesion:
- Apply Silicone Sparingly: Use only the amount of silicone needed for the job. Overapplication can make removal more difficult.
- Use Painter’s Tape: Apply painter’s tape to the surrounding surfaces before applying silicone. This will create a clean line and prevent silicone from adhering to unwanted areas.
- Use a Release Agent: Apply a release agent, such as petroleum jelly or silicone grease, to the surface before applying silicone. This will prevent the silicone from bonding strongly to the surface.
Conclusion
Removing RTV silicone can be a challenging task, but with the right tools, techniques, and patience, it can be done effectively and safely. Whether you choose mechanical removal, chemical removal, or a combination of both, remember to take the necessary safety precautions and protect the surrounding surfaces. By following the tips and guidelines in this comprehensive guide, you’ll be well-equipped to tackle any silicone removal project. Understanding how to remove RTV silicone is a valuable skill for any homeowner or DIY enthusiast, saving time and preventing damage to surfaces. Remember to always prioritize safety and use the appropriate tools and methods for the specific surface you are working on. [See also: How to Choose the Right Sealant for Your Project]
