How to Replace a Bike Tyre Inner Tube: A Comprehensive Guide
Getting a flat tyre is an inevitable part of cycling. Whether you’re a seasoned pro or a casual rider, knowing how to replace a bike tyre inner tube is a crucial skill. This guide provides a step-by-step walkthrough, ensuring you can get back on the road quickly and safely. We’ll cover everything from identifying the problem to mastering the replacement process. So, let’s dive in and learn how to replace a bike tyre inner tube efficiently.
Understanding the Basics
Before you start, it’s essential to understand the components involved. Your bicycle tyre consists of the outer tyre (the rubber casing) and the inner tube (the inflatable bladder inside). A puncture in the inner tube is usually the culprit when you get a flat. Knowing how to replace a bike tyre inner tube means understanding how these parts interact.
Tools You’ll Need
To successfully replace a bike tyre inner tube, gather these essential tools:
- Tyre levers (usually a set of two or three)
- New inner tube (matching your tyre size)
- Bicycle pump (hand pump or floor pump)
- Wrenches or Allen keys (if your wheels are bolted on)
- Patch kit (optional, for temporary repairs)
- Multi-tool (handy for various adjustments)
- Gloves (optional, to keep your hands clean)
Step-by-Step Guide to Replacing Your Inner Tube
Step 1: Prepare Your Bike
First, find a safe and stable place to work. Flip your bike upside down, resting it on the handlebars and saddle. If you have quick-release wheels, simply open the lever to release the wheel. If your wheels are bolted on, use the appropriate wrench or Allen key to loosen the nuts. Remember to loosen the brakes if necessary to allow the tyre to pass through the brake pads.
Step 2: Remove the Wheel
Carefully remove the wheel from the frame. If it’s the rear wheel, you might need to manipulate the chain to clear the cassette or freewheel. Set the wheel down on a clean surface.
Step 3: Deflate the Tyre Completely
If there’s any remaining air in the inner tube, deflate it completely by pressing the valve core. This will make it easier to remove the tyre.
Step 4: Use Tyre Levers to Remove One Side of the Tyre
Insert one tyre lever under the edge of the tyre bead (the part that sits inside the rim). Hook the lever onto a spoke. Insert a second tyre lever a few inches away from the first, and pry that section of the tyre off the rim. Once you have a section of the tyre off, you can usually run one of the tyre levers around the rim to remove the entire side of the tyre. Be careful not to pinch the inner tube during this process.
Step 5: Remove the Inner Tube
Once one side of the tyre is off the rim, carefully pull out the inner tube. Start at the valve and work your way around the tyre. Inspect the tyre inside and out for any sharp objects that may have caused the puncture. Remove any thorns, glass, or metal fragments you find. This is crucial to prevent another flat. Run your fingers along the inside of the tyre carefully.
Step 6: Inspect the Tyre
Before installing the new inner tube, thoroughly inspect the inside of the tyre for any remaining debris. This is a critical step to prevent future punctures. Look for any cuts, embedded objects, or signs of wear and tear. If the tyre is damaged, consider replacing it along with the inner tube.
Step 7: Slightly Inflate the New Inner Tube
Before installing the new inner tube, inflate it slightly. This will give it some shape and prevent it from getting pinched between the tyre and the rim. A small amount of air makes the process much easier.
Step 8: Install the New Inner Tube
Insert the valve of the new inner tube into the valve hole in the rim. Then, carefully tuck the inner tube into the tyre, working your way around the wheel. Make sure the inner tube is evenly distributed inside the tyre and not twisted or pinched.
Step 9: Seat the Tyre Back onto the Rim
Starting opposite the valve, use your thumbs to push the tyre bead back onto the rim. Work your way around the tyre, ensuring the bead is fully seated. The last section can be tricky, and you might need to use tyre levers. Be very careful not to pinch the inner tube when using tyre levers to seat the last part of the tyre. Ensure the tyre bead is evenly seated all the way around the rim.
Step 10: Inflate the Tyre to the Correct Pressure
Use your bicycle pump to inflate the tyre to the recommended pressure, which is usually printed on the sidewall of the tyre. Check the pressure with a gauge to ensure it’s within the recommended range. Over-inflation can cause the tyre to explode, while under-inflation can lead to pinch flats.
Step 11: Check the Tyre Seating
Before riding, inspect the tyre to ensure it’s properly seated all the way around the rim. Look for a consistent gap between the tyre bead and the rim. If you see any bulges or dips, deflate the tyre slightly and re-seat the bead.
Step 12: Reinstall the Wheel
Carefully reinstall the wheel onto the bike frame. If it’s the rear wheel, make sure the chain is properly seated on the cassette or freewheel. Tighten the quick-release lever or the wheel nuts securely. Reconnect the brakes if you disconnected them earlier.
Troubleshooting Common Issues
Pinch Flats
Pinch flats, also known as snake bites, occur when the inner tube is pinched between the tyre and the rim, usually due to under-inflation or hitting a sharp edge. To avoid pinch flats, ensure your tyres are properly inflated and be mindful of road hazards.
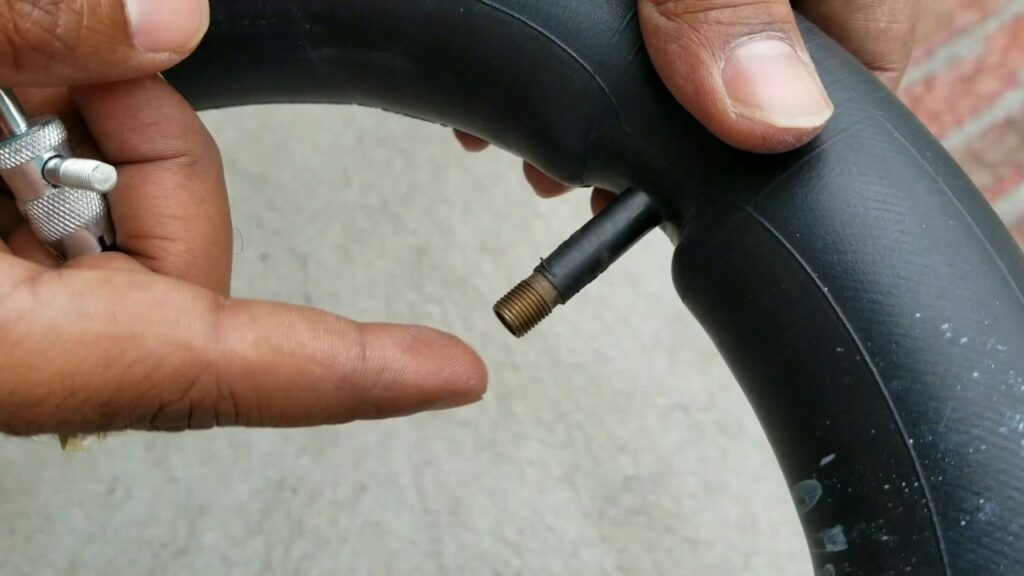
Valve Issues
Sometimes, the valve can be damaged or improperly installed. Make sure the valve is straight and securely attached to the inner tube. If the valve is leaking, consider replacing the inner tube or the valve core.
Tyre Not Seating Properly
If the tyre is not seating properly on the rim, it can cause a bumpy ride or even lead to a blowout. Deflate the tyre slightly, apply some soapy water to the tyre bead, and try to re-seat it. Ensure the tyre bead is evenly seated all the way around the rim.
Tips for Preventing Flats
- Maintain proper tyre pressure: Regularly check and adjust your tyre pressure to the recommended level.
- Inspect your tyres regularly: Look for cuts, embedded objects, or signs of wear and tear.
- Use tyre liners or sealant: These can provide an extra layer of protection against punctures.
- Avoid road hazards: Be mindful of potholes, glass, and other debris on the road.
Choosing the Right Inner Tube
Selecting the correct inner tube is crucial for optimal performance and safety. Consider these factors:
- Size: Ensure the inner tube matches your tyre size. The size is usually printed on the sidewall of the tyre.
- Valve type: Choose the valve type that matches your rims (Presta or Schrader).
- Material: Inner tubes are typically made of butyl rubber or latex. Butyl rubber is more durable and holds air better, while latex is lighter and offers a smoother ride.
Maintaining Your Tyres
Regular maintenance can extend the life of your tyres and prevent flats. Here are some tips:
- Clean your tyres regularly: Remove dirt, debris, and oil buildup with a mild detergent and water.
- Store your bike properly: Avoid storing your bike in direct sunlight or extreme temperatures, as this can damage the tyres.
- Replace worn tyres: If your tyres are showing signs of wear and tear, such as cracks or bald spots, replace them promptly.
Conclusion
Knowing how to replace a bike tyre inner tube is an essential skill for any cyclist. By following this comprehensive guide, you can quickly and safely get back on the road after a flat tyre. Remember to gather the necessary tools, follow the step-by-step instructions, and take preventative measures to minimize the risk of future flats. Happy cycling!
Whether you are looking to replace a bike tyre inner tube on your mountain bike, road bike, or hybrid, the principles remain the same. Practice makes perfect, so don’t be afraid to try it out. Soon, you’ll be a pro at changing your inner tube. Remember, knowing how to replace a bike tyre inner tube can save you time and frustration on the road or trail. So keep this guide handy, and you’ll be prepared for any flat tyre situation. Now you know how to replace a bike tyre inner tube. Good luck!
[See also: How to Choose the Right Bike Tyres]
[See also: Bike Maintenance Checklist]
[See also: Understanding Bike Tyre Pressure]
