How to Run a .py File: A Comprehensive Guide for Beginners and Beyond
So, you’ve written some Python code and saved it as a .py file. Now what? The next step is to actually *run* that code. This guide provides a clear, step-by-step explanation of how to **run a .py** file on various operating systems, covering everything from basic execution to troubleshooting common issues. Whether you’re a complete beginner or a seasoned developer looking for a refresher, this article will equip you with the knowledge you need to successfully execute your Python programs. Understanding **how to run a .py** script is fundamental to Python programming. Let’s dive in!
Understanding the Basics
Before we get into the specifics of running a Python file, let’s cover some fundamental concepts. A .py file is simply a plain text file containing Python code. To execute this code, you need a Python interpreter installed on your system. The interpreter reads the code, translates it into machine-readable instructions, and then executes those instructions. Different operating systems handle this process slightly differently, which we’ll explore in the following sections.
Running a .py File on Windows
Windows offers several ways to **run a .py** file:
Method 1: Using the Command Prompt (CMD) or PowerShell
- Ensure Python is Installed and in your PATH: First, make sure you have Python installed. You can download the latest version from the official Python website. During the installation process, be sure to check the box that says “Add Python to PATH.” This will allow you to **run a .py** file from anywhere in the command prompt.
- Open the Command Prompt or PowerShell: You can find these by searching for them in the Windows start menu.
- Navigate to the Directory Containing Your .py File: Use the
cdcommand to change directories. For example, if your file is located inC:UsersYourNameDocumentsPythonScripts, you would typecd C:UsersYourNameDocumentsPythonScriptsand press Enter. - Execute the File: Type
python your_file_name.py(replacingyour_file_name.pywith the actual name of your file) and press Enter. This command tells the Python interpreter to **run a .py** file.
Method 2: Double-Clicking the .py File
If you have Python correctly installed and associated with .py files, you can often simply double-click the file to execute it. However, this method has limitations. If your script requires user input or produces output to the console, the console window might disappear immediately after the script finishes, making it difficult to see the results. This method is best for scripts that don’t require user interaction or that write output to a file.
Method 3: Using an Integrated Development Environment (IDE)
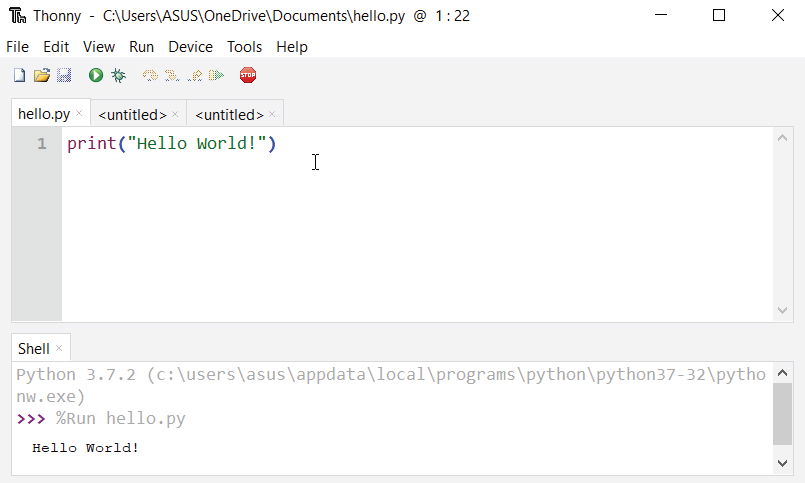
IDEs like PyCharm, VS Code with the Python extension, and Thonny provide a more robust and user-friendly way to **run a .py** file. These IDEs typically have a dedicated “Run” button or menu option that allows you to execute your code with ease. They also offer features like debugging, code completion, and syntax highlighting, making the development process much smoother. [See also: Setting Up VS Code for Python Development]
Running a .py File on macOS
Similar to Windows, macOS provides several ways to **run a .py** file:
Method 1: Using the Terminal
- Open the Terminal: You can find the Terminal application in the
/Applications/Utilities/folder. - Navigate to the Directory Containing Your .py File: Use the
cdcommand to change directories. For example, if your file is located in/Users/YourName/Documents/PythonScripts, you would typecd /Users/YourName/Documents/PythonScriptsand press Enter. - Execute the File: Type
python3 your_file_name.py(replacingyour_file_name.pywith the actual name of your file) and press Enter. Note the use ofpython3. On macOS, both Python 2 and Python 3 might be installed. Usingpython3explicitly tells the system to use Python 3.
Method 2: Using an IDE
As with Windows, using an IDE like PyCharm or VS Code with the Python extension is a highly recommended approach for developing and **run a .py** file on macOS. These IDEs offer a more integrated and feature-rich development environment.
Running a .py File on Linux
Linux distributions generally come with Python pre-installed. Here’s how to **run a .py** file:
Using the Terminal
- Open the Terminal: You can usually find the Terminal application in your applications menu.
- Navigate to the Directory Containing Your .py File: Use the
cdcommand to change directories. For example, if your file is located in/home/YourName/Documents/PythonScripts, you would typecd /home/YourName/Documents/PythonScriptsand press Enter. - Execute the File: Type
python3 your_file_name.py(replacingyour_file_name.pywith the actual name of your file) and press Enter. As with macOS, usingpython3explicitly tells the system to use Python 3. You can also use just `python` if your system is configured to default to Python 3.
Troubleshooting Common Issues
Sometimes, you might encounter issues when trying to **run a .py** file. Here are some common problems and their solutions:
- “Python is not recognized as an internal or external command”: This usually means that Python is not in your system’s PATH. You need to add the Python installation directory to your PATH environment variable. Refer to your operating system’s documentation for instructions on how to do this.
- “SyntaxError: invalid syntax”: This indicates that there is an error in your Python code. Double-check your code for typos, missing colons, incorrect indentation, and other syntax errors. The error message will usually indicate the line number where the error occurred.
- “ModuleNotFoundError: No module named ‘module_name'”: This means that your script is trying to import a module that is not installed. You can install the missing module using
pip, the Python package installer. For example, to install therequestsmodule, you would typepip install requestsin the command prompt or terminal. - File Not Found: Make sure the file name you are trying to execute is correct and that you are in the correct directory. Double check spelling and capitalization.
Using Virtual Environments
For more complex projects, it’s highly recommended to use virtual environments. A virtual environment is an isolated environment for your Python projects. It allows you to install packages specific to a project without affecting other projects or the system-wide Python installation. This helps to avoid dependency conflicts and ensures that your projects are reproducible. [See also: Python Virtual Environments: A Beginner’s Guide]
To create a virtual environment, you can use the venv module (available in Python 3.3 and later):
- Navigate to your project directory: Use the
cdcommand to change to the directory where you want to create the virtual environment. - Create the virtual environment: Type
python3 -m venv .venv(orpython -m venv .venvif Python 3 is your default) and press Enter. This will create a directory named.venv(or any name you choose) containing the virtual environment files. - Activate the virtual environment:
- On Windows: Type
.venvScriptsactivateand press Enter. - On macOS and Linux: Type
source .venv/bin/activateand press Enter.
- On Windows: Type
- Install packages: Once the virtual environment is activated, you can install packages using
pip. For example,pip install requestswill install therequestsmodule within the virtual environment.
When you’re finished working on the project, you can deactivate the virtual environment by typing deactivate in the command prompt or terminal.
Conclusion
Knowing **how to run a .py** file is a fundamental skill for any Python programmer. This guide has provided a comprehensive overview of the different methods for executing Python scripts on Windows, macOS, and Linux. By following these steps and troubleshooting tips, you’ll be well-equipped to **run a .py** file and start building your own Python applications. Remember to use virtual environments for larger projects to manage dependencies effectively. Happy coding!
