IP Blacklist Removal Online: A Comprehensive Guide to Getting Delisted
In the digital age, maintaining a clean online reputation is crucial for any business or individual. One significant threat to this reputation is being placed on an IP blacklist. An IP blacklist, also known as a DNSBL (Domain Name System Blacklist), is a real-time database of IP addresses that have been identified as sources of spam or malicious activity. If your IP address ends up on such a list, it can lead to serious consequences, including email delivery issues, website access restrictions, and a tarnished online image. Understanding IP blacklist removal online is therefore essential for ensuring uninterrupted service and maintaining a positive online presence.
This comprehensive guide will walk you through the intricacies of IP blacklists, explain why you might be blacklisted, and provide a step-by-step approach to IP blacklist removal online. We’ll also cover preventative measures to help you avoid future blacklisting.
Understanding IP Blacklists
An IP blacklist is a list of IP addresses that are suspected of sending spam, hosting malware, or engaging in other malicious activities. These lists are maintained by various organizations, and email servers, ISPs (Internet Service Providers), and other network administrators use them to filter out unwanted or harmful traffic. When an email server receives a message from an IP address on a blacklist, it may reject the message, mark it as spam, or deliver it to the recipient’s junk folder. This can significantly impact email deliverability and communication effectiveness.
Types of IP Blacklists
There are several types of IP blacklists, each with its own criteria for listing and delisting IP addresses. Some of the most common types include:
- Spamhaus Block List (SBL): A widely used blacklist that focuses on blocking spam and malware sources.
- Composite Blocking List (CBL): Identifies IP addresses that have sent spam through open proxies or botnets.
- SpamCop Blocking List (SCBL): Uses a reporting system where users can report spam, leading to IP addresses being added to the list.
- Barracuda Reputation Block List (BRBL): Blocks IP addresses based on their reputation for sending spam.
- UCEPROTECT Level 1: Blocks IP ranges based on the behavior of a single IP address within that range.
Why Your IP Address Might Be Blacklisted
Several factors can lead to your IP address being blacklisted. Understanding these reasons is crucial for preventing future occurrences. Some common causes include:
- Spamming: Sending unsolicited or unwanted emails, especially in bulk, is a primary reason for blacklisting. This can happen even if you’re not intentionally sending spam, as compromised accounts or malware infections can turn your server into a spam bot.
- Malware Infection: If your server or computer is infected with malware, it may be used to send spam or engage in other malicious activities without your knowledge.
- Compromised Accounts: Hackers can gain access to your email accounts and use them to send spam. This is especially common if you use weak passwords or fail to implement proper security measures.
- Open Relays: An open relay is an email server that allows anyone to send email through it, without requiring authentication. These servers are often exploited by spammers.
- Shared Hosting Issues: If you’re using shared hosting, your IP address may be blacklisted due to the actions of other users on the same server.
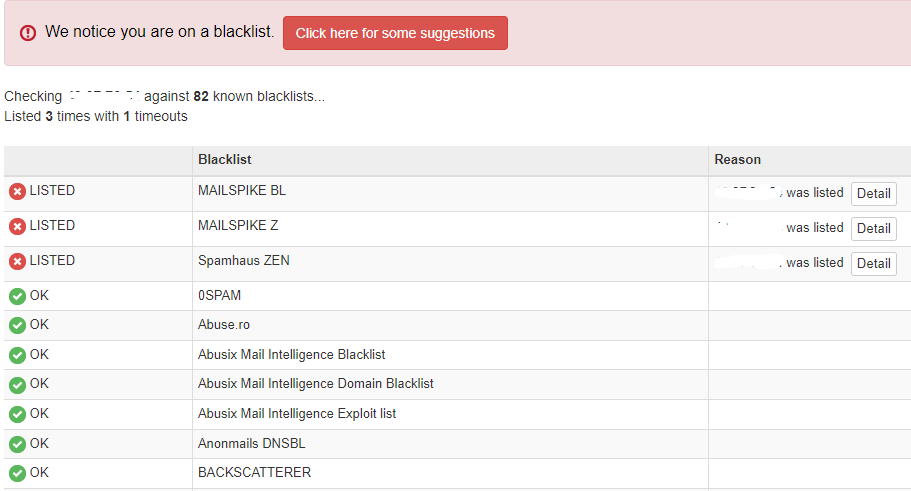
How to Check if Your IP Address is Blacklisted
Before you can begin the IP blacklist removal online process, you need to determine if your IP address is indeed blacklisted. There are several online tools available that can help you check your IP address against multiple blacklists simultaneously.
Here are a few popular options:
- MXToolbox: Provides a comprehensive blacklist check tool that scans your IP address against over 100 blacklists.
- WhatIsMyIPAddress.com: Offers a blacklist lookup tool that checks your IP address against several major blacklists.
- MultiRBL.valli.org: A simple and straightforward tool for checking your IP address against a variety of blacklists.
Simply enter your IP address into one of these tools, and it will provide a report indicating whether your IP address is listed on any blacklists. If your IP address is blacklisted, the report will also provide information about the specific blacklists on which it is listed.
The IP Blacklist Removal Online Process: A Step-by-Step Guide
Once you’ve confirmed that your IP address is blacklisted, you can begin the IP blacklist removal online process. This process typically involves the following steps:
Identify the Blacklists
The first step is to identify the specific blacklists on which your IP address is listed. The blacklist check tools mentioned above will provide this information. Make a note of each blacklist, as you’ll need this information later.
Determine the Reason for Blacklisting
Next, you need to determine why your IP address was blacklisted. This can be more challenging, as blacklists often don’t provide detailed information about the specific reason for listing an IP address. However, you can often infer the reason based on the type of blacklist and the activity on your server. For example, if you’re listed on a spam-focused blacklist, it’s likely that your server was detected sending spam.
Address the Underlying Issue
This is the most crucial step in the IP blacklist removal online process. You need to identify and address the underlying issue that led to your IP address being blacklisted. This may involve:
- Scanning your server for malware and removing any infections.
- Securing your email accounts with strong passwords and enabling two-factor authentication.
- Closing open relays and implementing proper authentication for your email server.
- Identifying and stopping any spam campaigns originating from your server.
- Contacting your hosting provider to investigate potential issues on shared servers.
It’s essential to thoroughly investigate and resolve the underlying issue before requesting delisting. Otherwise, your IP address may be quickly relisted.
Request Delisting
Once you’ve addressed the underlying issue, you can request delisting from the blacklists. The process for requesting delisting varies depending on the specific blacklist. Some blacklists offer an automated delisting process, while others require you to submit a delisting request manually.
Here are some general guidelines for requesting delisting:
- Follow the instructions provided by the blacklist. Each blacklist has its own specific delisting process. Make sure to carefully read and follow the instructions provided on the blacklist’s website.
- Provide accurate information. When submitting a delisting request, be sure to provide accurate information about your IP address, the reason for your request, and the steps you’ve taken to address the underlying issue.
- Be polite and professional. When communicating with blacklist administrators, be polite and professional. Avoid making demands or accusations.
- Be patient. The delisting process can take time. It may take several hours or even days for your IP address to be removed from a blacklist.
Monitor Your IP Address
After your IP address has been delisted, it’s important to monitor it to ensure that it doesn’t get blacklisted again. You can use the same online tools mentioned earlier to check your IP address against blacklists regularly. [See also: Maintaining a Clean IP Reputation]
Preventing Future Blacklisting
The best way to deal with IP blacklists is to prevent your IP address from being blacklisted in the first place. Here are some preventative measures you can take:
- Implement strong security measures. Protect your server and email accounts with strong passwords, two-factor authentication, and up-to-date security software.
- Monitor your server for suspicious activity. Regularly monitor your server logs for any signs of malware, spamming, or other malicious activity.
- Keep your software up to date. Install the latest security patches and updates for your operating system, email server, and other software.
- Use a reputable email service provider. If you’re using a shared hosting provider, consider using a reputable email service provider that has a good track record for email deliverability.
- Comply with email marketing best practices. If you’re sending bulk emails, make sure to comply with email marketing best practices, such as obtaining consent from recipients, providing an easy way to unsubscribe, and avoiding spam triggers in your email content.
Conclusion
Being blacklisted can have a significant impact on your online presence and communication effectiveness. Understanding IP blacklist removal online is crucial for restoring your reputation and ensuring uninterrupted service. By following the steps outlined in this guide and implementing preventative measures, you can minimize the risk of being blacklisted and maintain a clean online reputation. Remember that addressing the root cause of the blacklisting is paramount for long-term success. Regularly monitoring your IP reputation and staying vigilant about security threats will help you avoid future issues. The process of IP blacklist removal online requires patience and diligence, but the benefits of a clean IP address are well worth the effort.
The importance of proactive measures cannot be overstated. Investing in robust security protocols, regularly auditing your systems, and staying informed about the latest threats are essential for maintaining a secure and reliable online environment. Furthermore, understanding the specific policies and procedures of different blacklists is crucial for navigating the IP blacklist removal online process effectively.
Ultimately, maintaining a clean IP reputation is an ongoing effort. By prioritizing security, adhering to best practices, and staying informed about the ever-evolving landscape of online threats, you can protect your online presence and ensure that your communications reach their intended recipients. Don’t underestimate the power of proactive monitoring and swift action when dealing with potential blacklisting issues. The faster you identify and address the problem, the less impact it will have on your business or personal online activities. Therefore, mastering the art of IP blacklist removal online is a valuable skill in today’s digital world, ensuring that your online communications remain reliable and effective.
