Make Your Own Proxy Server: A Comprehensive Guide
In today’s interconnected world, online privacy and security are paramount. While commercial Virtual Private Networks (VPNs) and proxy services offer solutions, some users prefer the control and customization that comes with creating their own proxy server. This comprehensive guide will walk you through the process of building and configuring your own proxy server, exploring the benefits, potential drawbacks, and various methods available.
Why Make Your Own Proxy Server?
Before diving into the technical aspects, let’s examine the reasons why someone might choose to make your own proxy server instead of relying on a third-party service.
- Privacy Control: You have complete control over your data and browsing activity. You are not relying on a third-party provider who may log or sell your information.
- Cost Savings: Running your own proxy server can be more cost-effective in the long run, especially if you require a dedicated and consistent proxy solution.
- Customization: You can tailor the proxy server to your specific needs, including filtering content, blocking ads, and implementing custom security measures.
- Bypassing Restrictions: A personal proxy server can help bypass geo-restrictions or censorship imposed by governments or organizations.
- Learning Experience: Setting up a proxy server is a valuable learning experience for anyone interested in networking and system administration.
Understanding Proxy Servers
A proxy server acts as an intermediary between your computer and the internet. When you connect to a website through a proxy server, your request is first sent to the proxy server, which then forwards it to the website. The website responds to the proxy server, which then relays the information back to you. This process masks your IP address, making it appear as if you are browsing from the proxy server’s location.
Methods to Make Your Own Proxy Server
There are several methods to make your own proxy server, each with its own advantages and disadvantages. We’ll explore three popular options:
Using a Home Computer
One of the simplest ways to make your own proxy server is to use a spare computer at home. This method is suitable for personal use and small-scale testing.
- Choose an Operating System: Select a stable operating system like Linux (Ubuntu, Debian), Windows, or macOS. Linux is often preferred due to its flexibility and security features.
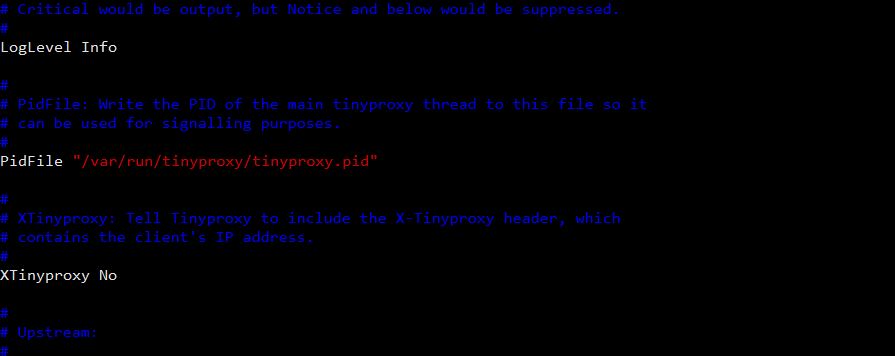
- Install a Proxy Server Software: Several proxy server software options are available, including Squid, Tinyproxy, and CCProxy (for Windows). Squid is a popular and powerful open-source option.
- Configure the Proxy Server: Configure the proxy server software to listen on a specific port and set up any necessary authentication or access control rules.
- Configure Your Devices: Configure your devices (computers, smartphones, tablets) to use the proxy server by specifying the proxy server’s IP address and port number in the network settings.
For example, on Ubuntu, you can install Squid using the following command:
sudo apt update
sudo apt install squid
Then, edit the Squid configuration file (/etc/squid/squid.conf) to customize the settings. Remember to restart the Squid service after making changes:
sudo systemctl restart squidUsing a Virtual Private Server (VPS)
A more reliable and scalable option is to make your own proxy server using a Virtual Private Server (VPS). A VPS is a virtual machine hosted by a third-party provider, offering dedicated resources and a stable internet connection.
- Choose a VPS Provider: Select a reputable VPS provider like DigitalOcean, Vultr, or Amazon Web Services (AWS).
- Select a VPS Plan: Choose a VPS plan that meets your needs in terms of CPU, RAM, storage, and bandwidth.
- Choose an Operating System: Select an operating system for your VPS. Linux distributions like Ubuntu or CentOS are commonly used.
- Install and Configure a Proxy Server Software: Follow the same steps as with a home computer to install and configure a proxy server software like Squid or Tinyproxy.
- Secure Your VPS: Implement security measures to protect your VPS from unauthorized access, such as setting up a firewall, using strong passwords, and keeping the operating system and software up to date.
Using a VPS offers several advantages over using a home computer, including:
- Higher Uptime: VPS providers typically offer high uptime guarantees, ensuring that your proxy server is always available.
- Faster Internet Connection: VPS servers are usually connected to high-speed internet connections, providing faster browsing speeds.
- Scalability: You can easily scale your VPS resources as your needs grow.
- Dedicated IP Address: A VPS provides a dedicated IP address, which can be useful for bypassing geo-restrictions.
Using a Raspberry Pi
A Raspberry Pi is a small, low-cost computer that can be used to make your own proxy server. This option is ideal for users who want a low-power and portable proxy solution.
- Install an Operating System: Install a lightweight operating system like Raspberry Pi OS (formerly Raspbian) on your Raspberry Pi.
- Install a Proxy Server Software: Install a proxy server software like Squid or Tinyproxy.
- Configure the Proxy Server: Configure the proxy server software to listen on a specific port and set up any necessary authentication or access control rules.
- Connect to Your Network: Connect the Raspberry Pi to your home network using Ethernet or Wi-Fi.
The steps for installing and configuring Squid on a Raspberry Pi are similar to those on a standard Linux distribution. However, you may need to adjust the configuration settings to optimize performance for the Raspberry Pi’s limited resources.
Configuring Your Devices to Use the Proxy Server
Once you have set up your proxy server, you need to configure your devices to use it. The process varies depending on the operating system and browser you are using.
Windows
- Open the Control Panel.
- Go to Network and Internet > Internet Options.
- Click on the Connections tab.
- Click on the LAN settings button.
- Check the “Use a proxy server for your LAN” box.
- Enter the IP address and port number of your proxy server.
- Click OK to save the changes.
macOS
- Open System Preferences.
- Go to Network.
- Select your network connection (e.g., Wi-Fi or Ethernet).
- Click on the Advanced button.
- Click on the Proxies tab.
- Check the “Web Proxy (HTTP)” and “Secure Web Proxy (HTTPS)” boxes.
- Enter the IP address and port number of your proxy server.
- Click OK to save the changes.
Web Browsers
Most web browsers also allow you to configure proxy settings directly within the browser. For example, in Google Chrome:
- Click on the three dots in the top-right corner.
- Go to Settings.
- Search for “proxy.”
- Click on “Open your computer’s proxy settings.”
- Follow the steps for your operating system to configure the proxy settings.
Security Considerations
When you make your own proxy server, security is a critical consideration. Here are some important security measures to implement:
- Use Strong Passwords: Use strong and unique passwords for your proxy server and VPS accounts.
- Enable Authentication: Enable authentication on your proxy server to prevent unauthorized access.
- Set Up a Firewall: Set up a firewall to block unwanted traffic to your proxy server.
- Keep Software Up to Date: Keep your operating system and proxy server software up to date with the latest security patches.
- Monitor Logs: Monitor your proxy server logs for suspicious activity.
- Use HTTPS: Ensure that your proxy server supports HTTPS to encrypt traffic between your devices and the proxy server.
[See also: Secure Your Network with a Proxy Server]
Potential Drawbacks
While make your own proxy server offers numerous benefits, it’s important to be aware of the potential drawbacks:
- Technical Expertise Required: Setting up and maintaining a proxy server requires some technical expertise.
- Maintenance Overhead: You are responsible for maintaining the proxy server, including applying security updates and troubleshooting issues.
- Potential Performance Issues: Depending on the hardware and network connection, your proxy server may not provide the same performance as a commercial VPN or proxy service.
- Legal Considerations: Be aware of the legal implications of using a proxy server, especially if you are using it to bypass geo-restrictions or access content that is illegal in your jurisdiction.
Conclusion
Making your own proxy server can be a rewarding experience, providing you with greater control over your online privacy and security. Whether you choose to use a home computer, a VPS, or a Raspberry Pi, carefully consider the security implications and potential drawbacks. By following the steps outlined in this guide, you can create a custom proxy server that meets your specific needs and enhances your online experience. Remember to prioritize security and keep your software up to date to protect your data and privacy.
