Mastering the Art of Cleaning Disk Brakes: A Comprehensive Guide
Disk brakes are a crucial component of any vehicle, providing reliable stopping power. However, their performance can be significantly affected by dirt, grime, and brake dust accumulation. Regularly cleaning disk brakes not only enhances their efficiency but also extends their lifespan, saving you money and ensuring safer rides. This comprehensive guide will walk you through the process, providing step-by-step instructions and expert tips for effectively cleaning disk brakes.
Why Cleaning Disk Brakes Matters
Before diving into the how-to, let’s understand why cleaning disk brakes is essential. Over time, brake pads wear down, producing fine dust that accumulates on the rotors, calipers, and other brake components. This dust, combined with road grime and moisture, can create a abrasive paste that accelerates wear and reduces braking performance. Symptoms of dirty disk brakes include:
- Squealing or grinding noises when braking
- Reduced braking power
- Increased stopping distance
- Uneven brake pad wear
By regularly cleaning disk brakes, you can prevent these issues and maintain optimal braking performance. Additionally, cleaning allows you to inspect your brakes for any signs of damage or wear, enabling you to address potential problems before they escalate.
Tools and Materials You’ll Need
To effectively clean disk brakes, gather the following tools and materials:
- Brake Cleaner: Specifically designed to dissolve brake dust and grime without damaging brake components.
- Soft Brush: A nylon brush or toothbrush to scrub away stubborn dirt.
- Rags or Paper Towels: For wiping away cleaner and debris.
- Gloves: To protect your hands from chemicals and grime.
- Safety Glasses: To prevent brake cleaner from splashing into your eyes.
- Wheel Chocks: To secure the vehicle while working.
- Jack and Jack Stands (Optional): For easier access to the brakes.
Step-by-Step Guide to Cleaning Disk Brakes
Follow these steps to safely and effectively clean disk brakes:
Preparation is Key
- Safety First: Park your vehicle on a level surface, engage the parking brake, and use wheel chocks to secure the wheels.
- Raise the Vehicle (Optional): If desired, use a jack to lift the vehicle and secure it with jack stands. This provides easier access to the brakes.
- Remove the Wheel: Use a lug wrench to loosen the lug nuts and remove the wheel.
Cleaning the Brake Components
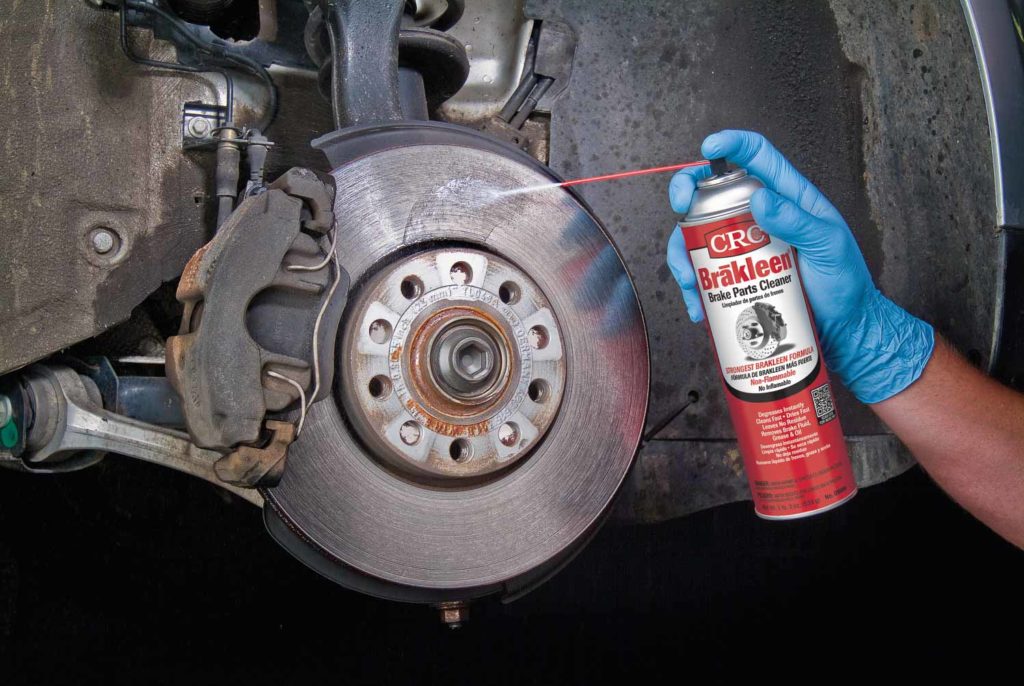
- Apply Brake Cleaner: Generously spray brake cleaner onto the rotor, caliper, and surrounding brake components.
- Scrub Away Dirt: Use a soft brush to scrub away stubborn dirt and grime. Pay particular attention to the caliper and rotor surfaces.
- Wipe Clean: Use a clean rag or paper towel to wipe away the brake cleaner and loosened debris.
- Repeat as Necessary: If necessary, repeat steps 1-3 until the brake components are clean.
- Allow to Dry: Allow the brake components to air dry completely before reassembling the wheel.
Reassembly and Final Touches
- Reinstall the Wheel: Carefully reinstall the wheel and tighten the lug nuts by hand.
- Lower the Vehicle (If Applicable): If you raised the vehicle, carefully lower it to the ground.
- Torque Lug Nuts: Use a torque wrench to tighten the lug nuts to the manufacturer’s specified torque.
- Test the Brakes: Before driving, pump the brakes several times to ensure they are functioning properly.
Advanced Tips for Disk Brake Maintenance
Beyond routine cleaning disk brakes, consider these advanced tips for optimal brake maintenance:
- Inspect Brake Pads: Regularly inspect your brake pads for wear. Replace them when they reach the minimum thickness recommended by the manufacturer.
- Check Brake Fluid: Check the brake fluid level and condition. Top off as needed and replace the fluid every two years or as recommended by the manufacturer. [See also: Brake Fluid Maintenance]
- Lubricate Caliper Slides: Lubricate the caliper slides with a high-temperature brake grease to ensure smooth caliper movement.
- Consider Ceramic Brake Pads: Upgrade to ceramic brake pads for reduced brake dust and improved braking performance.
Choosing the Right Brake Cleaner
Selecting the appropriate brake cleaner is crucial for effective and safe cleaning disk brakes. Look for a brake cleaner that is:
- Non-Chlorinated: Non-chlorinated brake cleaners are safer for the environment and less likely to damage brake components.
- Fast-Drying: A fast-drying formula will save you time and prevent residue buildup.
- Residue-Free: Choose a brake cleaner that leaves no residue, ensuring optimal braking performance.
Addressing Common Disk Brake Issues
Regular cleaning disk brakes can prevent many common issues. However, if you experience persistent problems, consider these potential causes:
- Warped Rotors: Warped rotors can cause vibration and reduced braking power. They may need to be resurfaced or replaced.
- Sticking Calipers: Sticking calipers can cause uneven brake pad wear and reduced braking performance. They may need to be rebuilt or replaced.
- Contaminated Brake Pads: Brake pads contaminated with oil or grease can significantly reduce braking power. They should be replaced.
The Importance of Professional Brake Service
While cleaning disk brakes is a relatively simple task, more complex brake repairs and maintenance should be performed by a qualified mechanic. If you are uncomfortable working on your brakes or suspect a serious problem, consult a professional. [See also: When to See a Brake Specialist]
Cleaning Disk Brakes on Different Vehicles
The general process of cleaning disk brakes remains consistent across various vehicle types, including cars, trucks, motorcycles, and bicycles. However, there might be slight variations in the design and accessibility of the brake components. For instance, motorcycle disk brakes often require specialized tools for caliper removal. Similarly, some high-performance vehicles may feature more complex braking systems that demand a deeper understanding of their specific components.
Environmental Considerations
When cleaning disk brakes, it’s essential to consider the environmental impact. Brake cleaner can be harmful to the environment, so dispose of used cleaner and rags properly. Avoid spraying cleaner into storm drains or waterways. Consider using biodegradable brake cleaners or collecting used cleaner for proper disposal at a hazardous waste facility.
Preventive Measures for Cleaner Brakes
Besides regular cleaning disk brakes, several preventive measures can help keep your brakes cleaner for longer:
- Avoid Aggressive Braking: Reduce hard braking and sudden stops to minimize brake dust production.
- Regular Car Washes: Frequent car washes can help remove road grime and salt that can contribute to brake dust buildup.
- Use Brake Dust Shields: Brake dust shields can help prevent brake dust from accumulating on your wheels and calipers.
Conclusion: Maintaining Optimal Braking Performance
Cleaning disk brakes is a vital part of vehicle maintenance that ensures safe and efficient braking. By following the steps outlined in this guide and incorporating the advanced tips, you can keep your brakes in top condition, extending their lifespan and enhancing your driving experience. Remember to prioritize safety and consult a professional mechanic for any complex repairs or concerns. Regular cleaning disk brakes translates to safer roads and a more reliable vehicle. Take the time to properly maintain this crucial system, and you’ll be rewarded with improved performance and peace of mind.
